Friday, January 29, 2010

Do you like chutney?

Hubby Chris introduced me to Indian food and I love it, especially curries and chutney.

Chutney is an Indian condiment made with fruit and spices that's great with any type of dish.


I love chutney! If I could, I'd eat chutney and salsa everyday with everything. I've made tomato and pineapple chutneys in the past.


On Wednesday, I made a tomato-onion chutney with aromatic chicken curry and rice from "Best Ever Indian Cookbook," by Mridula Baljekar, Rafi Fernandez, Shehzad Husain and Manisha Kanani. I love this cookbook and recommend it to anyone interested in dabbling in Indian cooking.

The chicken curry had tomatoes and broccoli and several spices, and I cooked the rice in chicken stock.

For the chutney, I didn't have fresh tomatoes on hand so I used two cans of diced tomatoes. I did have an onion, but didn't feel like peeling it (lazy!) so I used onion flakes instead. Here's the recipe:

Fresh Tomato and Onion Chutney

Ingredients:
8 tomatoes, quartered
1 medium onion, chopped
3 tbsp. brown sugar
1 tsp. garam masala (found in the spice aisle)
1 tsp. ground ginger
3/4 cup malt vinegar (I used apple cider vinegar)
1 tsp. salt
1 tbsp. honey

1. Place the tomatoes and onion into a heavy pan.
2. Add sugar, garam masala, ginger, vinegar, salt and honey. Cook over low heat for 20 minutes.
3. Mash the tomatoes with a fork to break them up. Continue to cook on slightly warmer heat until chutney thickens.


Most Indian restaurants that I've visited usually serve a mint or other type of chutney with naan, a flat, leavened Indian bread. I haven't attempted to make naan yet because it requires rolling it flat, baking it and then finishing it off under a broiler. (Again, lazy.)

I have, however, made chapatis, another Indian bread that is unleavened and is cooked on the stovetop. Here's the recipe from "Best Ever Indian Cookbook:"

Chapatis

Ingredients:
2 cups chapati flour or ground whole-wheat flour
1/2 tsp. salt
3/4 cup water


1. Mix all ingredients together. Knead for 7-10 minutes.
2. (Can let dough sit for 15-20 minutes if you want. I didn't.) Divide dough into 8 to 10 portions. Roll out each into a circle on floured surface.
3. Place a skillet (or griddle) over high heat. When hot (steaming or when water quickly evaporates when you sprinkle it on the surface), lower to medium heat and add chapati(s) to pan.
4. When chapati(s) begins to bubble and is brown, turn it over and press down to flatten and cook on the other side.

If you enjoy these recipes, check out "Best Ever Indian Cookbook" or other books by the authors.

If you look for another Indian cookbook, I recommend finding one that you know you'll use. Don't buy one that gives measurements in metrics if you don't want to do math every time you want to cook a recipe.

I also like how "Best Ever Indian Cookbook" provides several basic recipes so you can make things from scratch if you can't find them in local stores, helpful if you don't live in a metropolitan area. That might be a feature to look for. Some recipes "Best Ever Indian Cookbook" provides are paneer (a cheese), curry paste, coconut milk, tikka paste and garam masala mix.

Friday, January 22, 2010

Merry (Belated) Christmas!

I'm finished! The shawl for my mother-in-law is ready to be dropped in the mailbox.

The shawl was knitted from yarn my mother-in-law already had on hand. Her mother gave it to her years ago -- the date on the yarn is 1977!

My mother-in-law has held on to the yarn, hoping to find a way to use it. She'd tried to crochet with it, and so did I, but the yarn was too difficult to pick up stitches. So I knitted it with circular needles instead.

I hope I can get this belated Christmas gift -- and a note -- in the mail tomorrow.

Table solutions

In another post, I told you about how steam and heat from a recent batch of bread ruined our antique table. Yes, I'm still not over that. Still pretty upset about it.

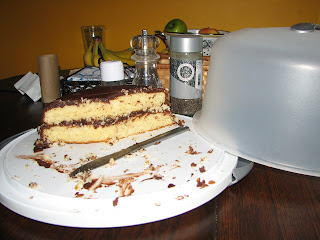
So upset in fact, I baked a cake (which I set on the counter to cool, not the table) and placed it and the cake pan on the table over the offensive spot so I wouldn't have to see it every time I walked by.
I'm in search of another way to fix the damage rather than going through the whole process of sanding and refinishing the whole table leaf. Besides being too time consuming, I'm worried the color, after refinishing, will not match the rest of the table or two other leaves.

While visiting with my grandparents this week, Nannie gave me an insert from one of her most recent "Taste of Home" magazines. The insert listed a variety of tips for home remedies, such as removing candle wax from carpet.

One of those tips happen to be about using a pecan to restain table scratches, etc. Supposedly the oil from the pecan would naturally dye the wood.

I figured I had nothing to lose so I thought I'd give it a try.

As you can see, the spot isn't quite as . . . bright . . . as it once was. But it's still there.

So, next up . . . the old trusty Old English polish.

But, unfortunately, I only have polish for lighter stained woods. So that didn't work either.

If anyone has some suggestions or ideas, please share! Or any round table clothe to throw over the table would be appreciated too.

Tuesday, January 19, 2010

Crackers!

Using Bill Neal's "Biscuits, Spoonbread, and Sweet Potato Pie," I poked my toe into the world of cracker-making.


Yep. Crackers. Didn't know you could make 'em? That's the same thing a colleague said to me when I told her I made some crackers the other week.

I've always wondered what dough was used to make crackers and how they were baked, etc. Turns out, it's just biscuit dough, rolled to wafer thin.

In Neal's book I found recipes for two types of crackers -- one used with the old fashioned Southern biscuit dough (note -- lots of beating involved) and the more modern biscuit flour that uses baking powder. I tried both.

The first batch weren't too bad, but I wasn't that impressed either. Neal literally tells the reader to find a rolling pin, broken broom end or hammer to knead/beat the dough for 15 minutes, no less. I got tired and gave up after 7 minutes of beating. I spent the last 8 minutes catching my breath and rolling out the dough for the crackers.

I didn't add any additional toppings, such as salt, to the crackers. Just baked them for the 5-7 minutes. They seemed to be too biscuit like and didn't have a lot of taste like store bought crackers. I assumed that I didn't roll the crackers out thin enough and should have added salt. And with all that beating, they just weren't worth it.

The second batch was easier. I used scrap dough from some biscuits I made over the weekend. I also made sure to prick the cut out crackers with a fork a few times (which I was supposed to do the first time, but forgot to do) and sprinkled a little salt on top. These turned out much better and reminded me more of crackers you'd expect to find in a store or restaurant.

This batch was thin, crisp and had just enough taste (salt).

I also had a little accident in the kitchen this weekend that nearly drove me to tears.

After baking a couple loaves of bread, I placed them on wire racks on the table to cool. Thinking myself wise, I placed a kitchen towel under the racks to catch any crumbs.

Instead this somehow was not a good idea. I caused heat and/or water damage to my antique table and I don't know how.
See those white angel wings? That's not the flash of the camera or a trick of the light. That's damage from the steam and heat of the bread. Arrrrrggggghhhhhh!

Hubby thinks a little sanding and refinishing will take care of the problem. But that still doesn't make me feel any better. :(

From now on, all baked goods will cool on the counter!

Tuesday, January 12, 2010

On trend

I'm not one to usually follow trends. I like to look at them to get ideas, but, otherwise, don't really care and don't break the bank to follow the crowd.

But I was excited to see this on MyStyle's blog today! Houndstooth!

Why so excited? I actually bought beautiful houndstooth wool material a little more than a year ago to make a jacket out of. So, if I can finally get this project finished, I'll be right on trend!

But, I'll have to finish it before it starts to turn warmer. And I've got to figure out how to set in sleeves, something I haven't attempted yet.

Mmmmm . . . pressure.

Friday, January 8, 2010

Review of final 2009 crafting

Here is a quick review of the final projects I hammered out in the final few months of 2009.

For me, there was the A-line skirt that laid around for months. I finally finished it when there was snow on the ground, way to cold to wear it until summer 2010 rolls around.

I struggled over how to sew on some fabric to make the back part of the skirt as wide as it needed to be. I finally cut out some fabric and just sewed a simple seam. I can tell where the additional fabric is, but the pattern is busy so it shouldn't matter much.

Since this was a remnant given to me by my grandmother, I shouldn't have been too worried if I messed up or if someone noticed where I added on the additional fabric. But I did. So I kept putting of completing this relatively easy pattern.

Now I don't know why it took my so long. This is made from Simplicity 2906.


I also made socks for myself from "I can't believe I'm knitting Socks," By Cindy Guggemos. I've spoken of this before and I love it. This pattern is the eyelet chevron.


It's a difficult pattern, but I liked it so much, I made my mom a pair for Christmas. And I plan to make my sister a pair too. Hers will be made in variegated yarn in beige, blue and brown.


I also made Mom placemats out of quilting fabric and a wide piece of double bias tape.

Since Mom, Dad and my younger sister and brother went to Hawaii a few years ago and really enjoyed the vacation, I thought I'd try to capture that. I went in search of a pattern with palm trees. But instead I found this and fell in love with it.


It depicts all things Hawaiian, from the islands and their names, to hibiscus flowers and ukuleles.

I also made some of Chris' family members how fiber treats.

For Anita, Chris' sister-in-law, I made her a sleeveless hoodie.


The pattern is from "Crocheted Sweaters: Simple Stitches, Great Designs," by Susan Huxley. I actually received that book from Anita and Richard, Chris' brother, last year for Christmas. I thought it fitting to make a gift from it. :)

I made a size medium and it fit Anita pretty well. It was a little snug, but that's what she liked about it. It wasn't big and boxy as some crocheted sweaters tend to be. I also made the shirt longer than the pattern called for because it seemed to be pretty short.

For Chris' dad I brushed up on my embroidery and picked out three designs to stitch onto handkerchiefs — a "B," a snowflake and a mortar and pestle, since he's a retired pharmacist.


I'm also finishing up a wool shawl for my mother-in-law. I didn't get it or my sister's socks finished in time for the holidays. But I'll get their presents to them as soon as possible. They know they're coming.

I also baked four zucchini, two sweet potato and two lemon poppy seed breads for
Christmas and gave them away with homemade peach honey. I've heard rave reviews all since Christmas. :)